Chapter 1 · 1B Calendar guide
Getting started: install 1B Calendar on Windows and Linux
Install 1B Calendar, open it and add your calendars. There's no 1Byte account to create.
Install 1B Calendar
- Download 1B Calendar from its page on 1bytesystems.com: the installer for Windows 10 and 11, or the RPM (Fedora, openSUSE), DEB (Debian, Ubuntu, Linux Mint) or AppImage package for Linux.
- On Windows, run the installer. It installs for your user only, without administrator rights. The installer isn't signed yet: if SmartScreen or your antivirus warns you, choose More info › Run anyway.
- On Linux, open the package with your software centre or install it from a terminal. The AppImage runs without installing: make it executable and open it.
- Open 1B Calendar. It starts with a calendar On this computer and the button Connect calendars at the bottom of the left column.
1B Calendar updates itself afterwards: chapter 10 explains how.
The window
On the left: the month, and your calendars grouped by account. Each calendar has an ink, shown on the edge of its events; click a calendar to hide or show it. At the bottom you see when it last synced.
At the top: Today, the arrows to move back and forward, the views Day, Week, Month and Agenda, and Event to create one. The search box, sync, the invitations tray and Settings are in the title bar.
Keyboard: N new event, T today, D, W, M and A for the views, I for invitations, the left and right arrows to move, Ctrl K to search and Esc to close.
Connect your calendars
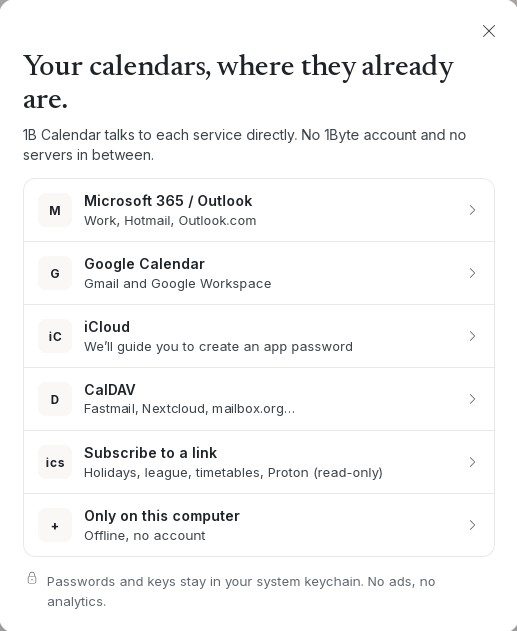
Click Connect calendars and choose: Microsoft 365 / Outlook, Google Calendar, iCloud, CalDAV, Subscribe to a link or Only on this computer. Each one has its own chapter in this guide.
Accounts sync both ways every 5 minutes and right after each change you make. You can add as many as you like.
For 1B Calendar 0.1.1 on Windows and Linux.