Chapter 1 · Guide · 1B Terminal
Getting started: add your first server
In a couple of minutes you'll have your server saved and connected. You only need its address, your user name and a password or an SSH key.
Add a server
Servers are saved on the Hosts tab. Each one keeps its address, user, how you log in and its own preferences.
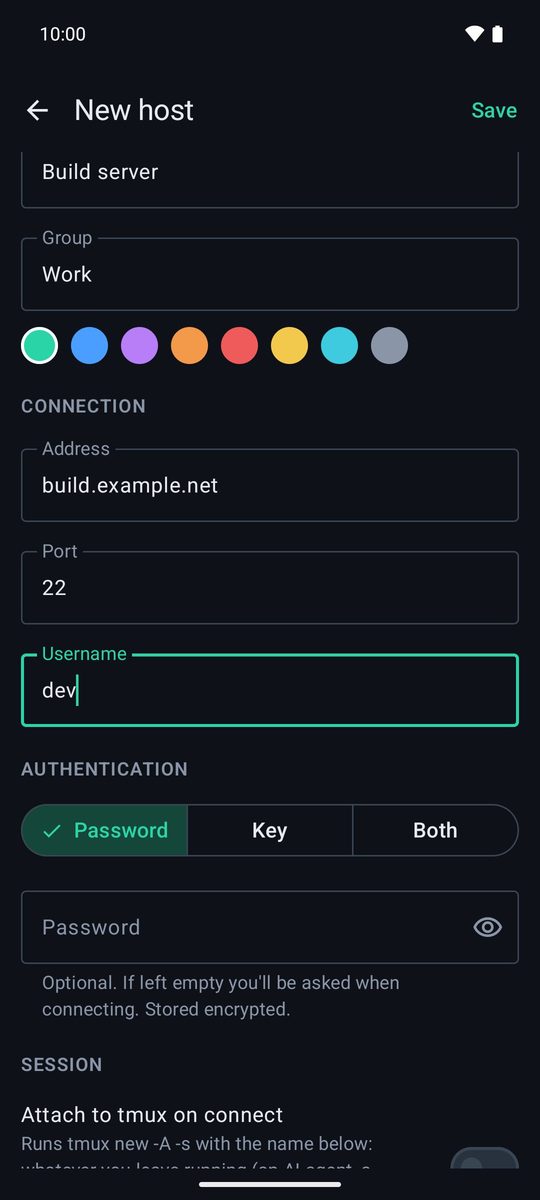
- On Hosts, tap +. The New host screen opens.
- Under General, give it a Label (for example, “Build server”) and, if you like, a Group to keep similar servers together.
- Under Connection, type the Address (an IP address or a name such as
server.example.com), the Port (22 unless your server uses another) and your Username. - Under Authentication, choose Password, Key or Both (see below) and tap Save.
- Tap the host in the list to connect.
Connect without saving
To connect once, type user@server in the Search or user@host box at the top of Hosts and tap Connect to… just below it. You can add the port with user@server:2222, or paste a whole ssh user@server -p 2222 command.
Log in with a password
Choose Password and type it in. It's optional: if you leave it empty, the app asks for it every time you connect. A saved password is stored encrypted with your phone's Android Keystore and never leaves the phone.
Log in with a key
A key is safer than a password and saves you typing it. Keys live on the Keychain tab and any host can use them.
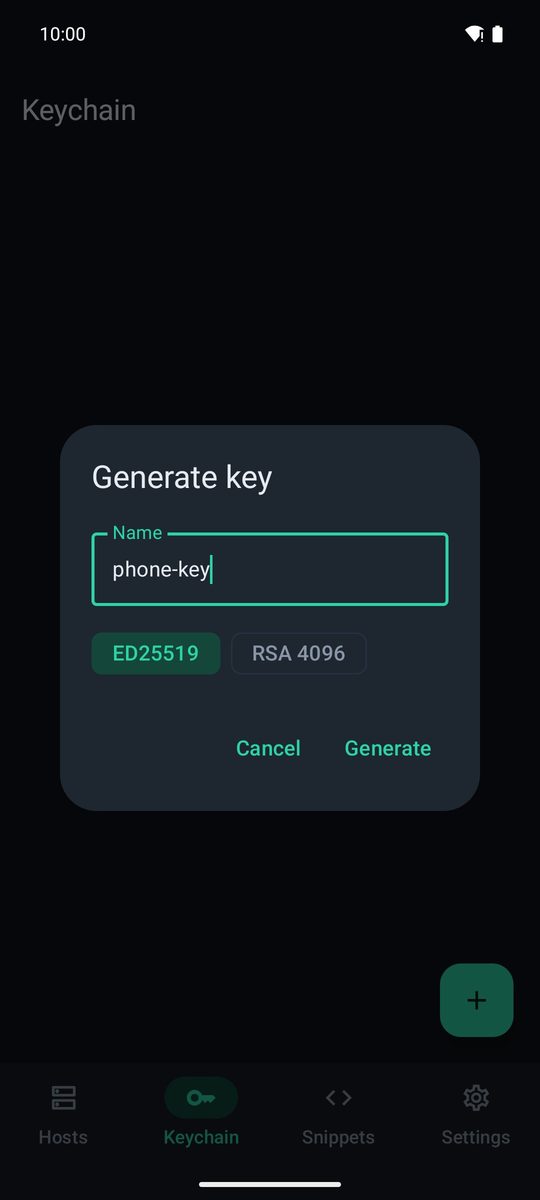
- On Keychain, tap + and choose Generate key. Give it a Name, keep ED25519 (or choose RSA 4096 for old servers) and tap Generate.
- Tap the new key. You'll see its public key: tap Share to send it to yourself, or copy it from the screen.
- On the server, add that line to
~/.ssh/authorized_keysof your user. - Edit the host, choose Key under Authentication, pick your key in SSH key and save.
Already have a key? Choose Import key instead: paste the Private key or tap Choose file…, and type its Passphrase (if any). Both tries the key first and then the password.
Check the server's fingerprint
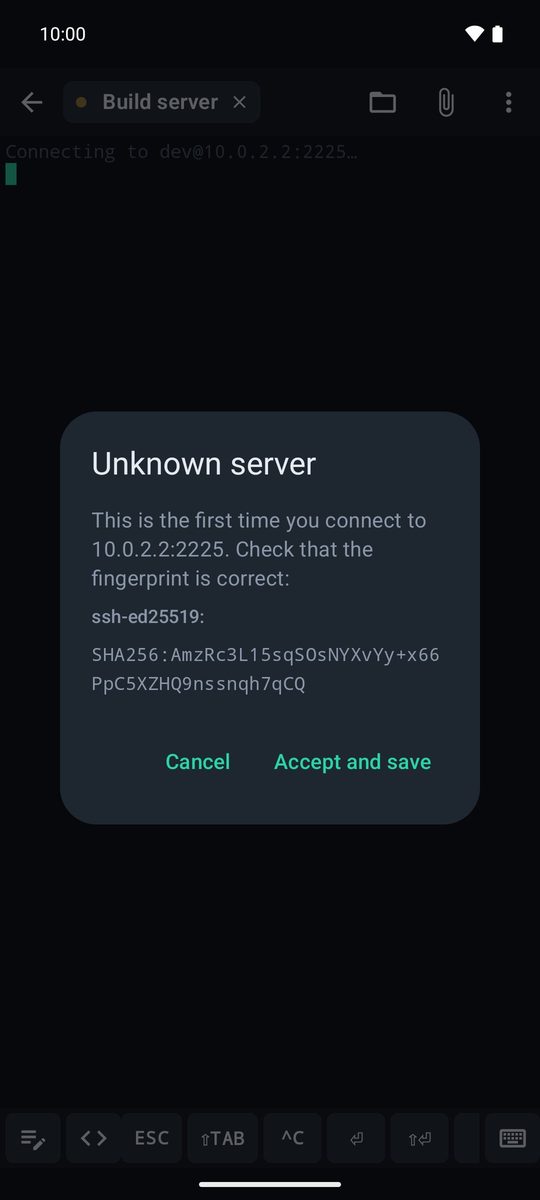
The first time you connect, the app shows Unknown server with the server's fingerprint. Compare it with the one the server shows (ssh-keygen -lf /etc/ssh/ssh_host_ed25519_key.pub) and tap Accept and save.
From then on the app checks it on every connection. If it ever changes, the connection is blocked and you'll see The server fingerprint has changed! (see the Security chapter). Accepted fingerprints are listed in Settings › Connection › Known hosts, where you can forget them.
Your first session
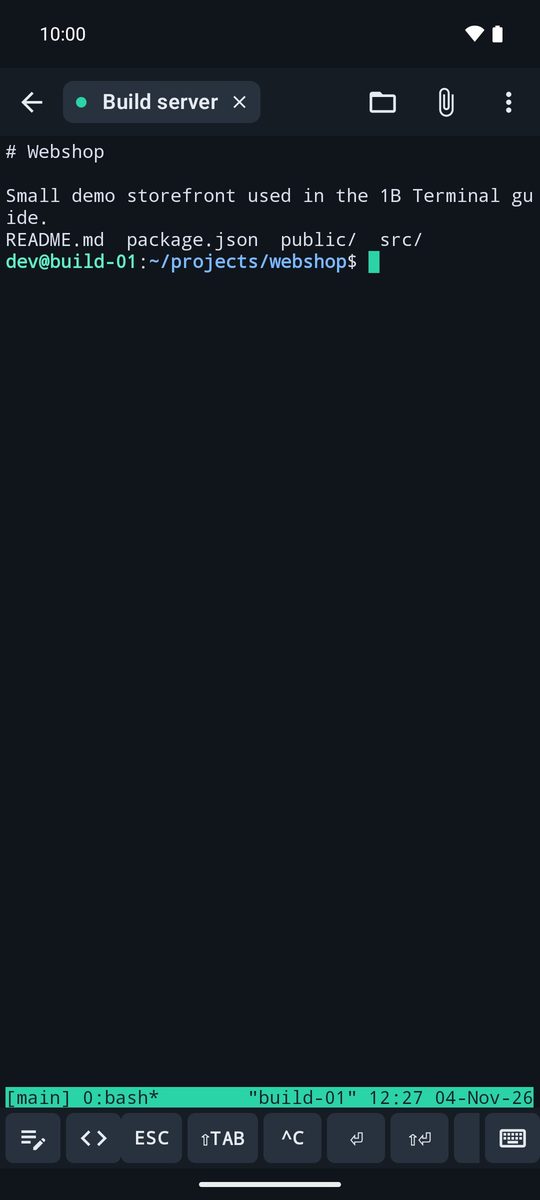
Once connected you're in the terminal. Type with your keyboard, use the keys bar above it (ESC, TAB, CTRL, arrows…) and pinch the screen to change the text size. Every open connection is a tab at the top; the arrow takes you back to Hosts while the sessions keep running.
The ⋮ menu has Paste, Select text…, Snippets, Files, Port forwarding, Find and, at the end, Disconnect and Close session.
Written for 1B Terminal 1.2 with real screenshots of the app and example data.